DIY Raft Rod Tube
We met sometime around kindergarten and have been friends ever since – roughly thirty years. As kids we built pea-shooters and forts, and spent afternoons playing with legos. When we got drivers licenses we had matching mid 80’s two wheel drive Toyota pickups. We figured if you brought both that equaled four wheel drive and we aimed to prove it.
Fast forward to the present day and my buddy and I are living in the same town for the first time in over a decade. He has a sweet raft, and well, I needed one. Overly generous in letting me use his boat, he protested when I was caught slipping a bottle of scotch in the back seat of his truck as a small token of my appreciation.
Casually, I mentioned I had intentions of making him rod holders for his raft, but that I wasn’t going to get around to it before this trip. This is where old habits die hard. I’m often full of great ideas, but making them happen, particularly when they involve engineering and power tools, is not my strength. My buddy doesn’t share this problem. He’s a craftsman with a gift for creating things. This was evident as kids, and now he’s a design build architect.
Before I knew it we were driving around town buying PVC pipe, adhesive, webbing straps and making calls to track down the perfect router bit. Supplies in hand, we were soon in the shop firing up the router, making plunge cuts, honing with the belt sander and making our vision a reality. My buddy’s expertise was aided by my superior talent for holding things when asked. We were set.
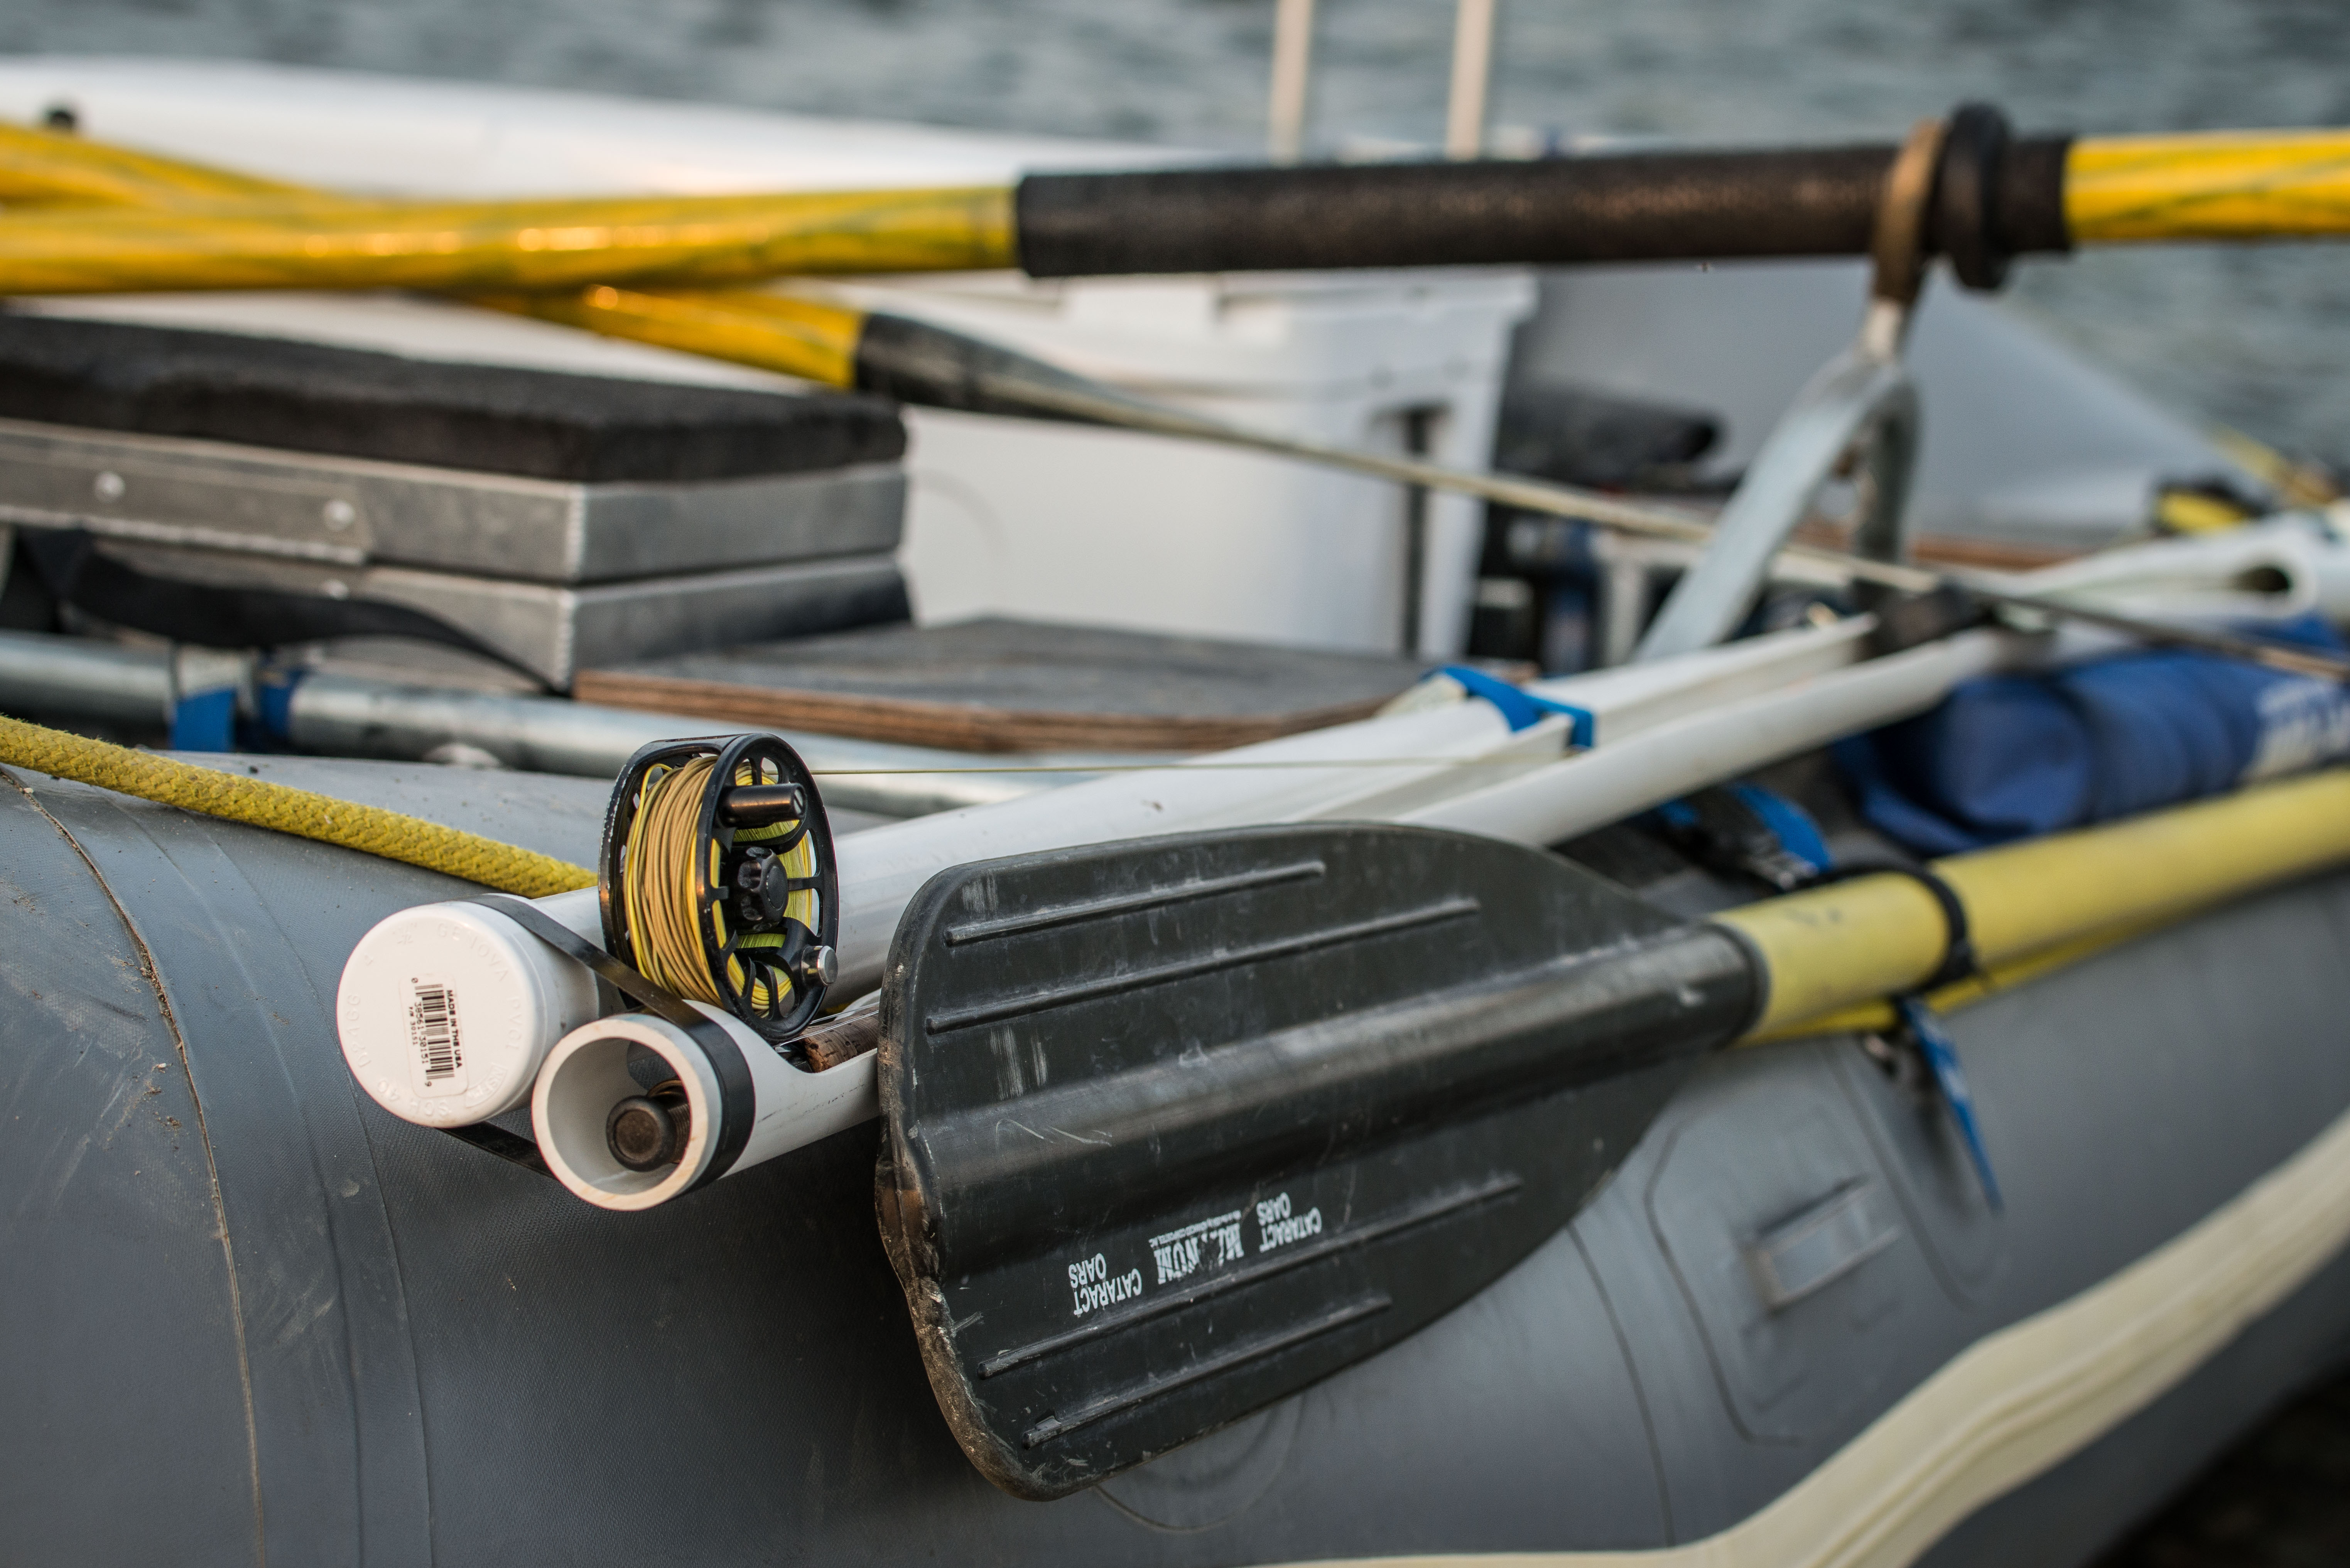
By evening’s end we had a set of serviceable rod tubes. The following day I headed off on a five day river trip. Rods remained secure and accessible for the duration.

Step by step Guide (from the guy without the actual skills to follow these directions):
Materials: 10′ 1.5 inch PVC pipe, end cap, adhesive, 6″ NRS straps (2), double to make two holders.
- Use a router, with large bit (.5 inches?), to make a plunge cut beginning two inches from end of tube and cut lengthwise for approximately 7 feet. Starting a couple inches from the end keeps the rod from siding out. Similarly creating a long opening in the tube allows for easy rod removal while floating.
- Use a belt sander to enlarge the groove and carve out an inset groove for the real seat, on the end where you began your cut. Sand to a smooth finish with orbital sander.
- Attach end cap to the end opposite the reel seat. Drill hole on bottom for drainage.
- Attach to raft frame with NRS straps. On the end where the strap would need to go over the rod tube opening cut two small slots in the bottom of the PVC pipe and place strap through. This will allow your rod to lay smoothly over the strap.
- If desired, make two tube holders and attach them to the raft frame facing in opposite directions, allowing anglers in the front and rear of the boat to store rods easily.